Radionics Posts

Bio-shield

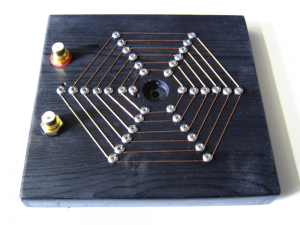
My bio-shield was inspired by a sacred geometry protection seal which was designed by the Sevranx brothers. I first came across this design on Chris Gozdzik’s site “divining mind”

I feel that although the symbolic design would work, it needed to be enhanced to make it even more powerful. It has only become possible quite recently to do what I wanted with the shield, with a little help from Joseph Max of Aetheric Arts, I was able to emulate the loop antennas of early radio. This shield also became a proof of concept, which allowed me to try out the winding method so that it could be used in a field radionics device which is in the pipeline.

The design and construction of the shield employs early stealth technology in a proprietary manner, the component of which I have had sitting on a shelf for years and only decided to use fairly recently. The aim is to match the bio-electrical signature of the witness and pass an equal opposing signal around it, this would have a scalar effect cancelling out the biological signal rendering the target invisible to all that would wish them harm.

The tech for such shielding exists on warships, but is employed only to make the ship magnetically inert.

15Hz Zapper Schematic

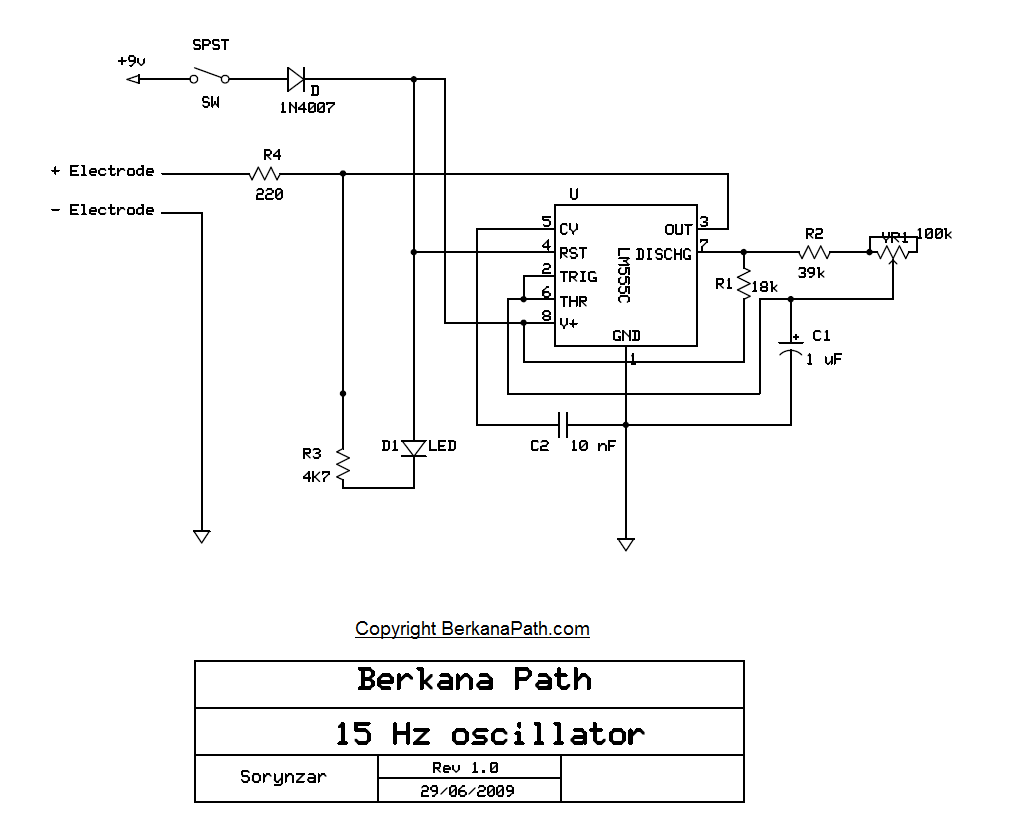
I have uploaded my own personal schematic of a 15Hz zapper circuit. I spent some time trying to find a good schematic to follow last year, but I discovered that most of them were flawed and the timing formulas did not equate their components to being the correct 15Hz output. To remedy this, I drew my own schematic, built the circuit on a breadboard and tested the output using an oscilloscope. (Yes I test my circuits, unlike some armchair engineers) It is quite difficult to get an analogue circuit dead on 15Hz due to the poor tolerance of the components. The best tolerance you can get for this particular circuit components are 1% for the resistors and 2% for the capacitors. All of this considering, I managed to get the zapper circuit tuned to 15.15Hz using the variable resistor. Without the tuning, the circuit could output anywhere from 12-20Hz.

While this circuit is labelled as a zapper circuit it does not necessarily need to be used for that purpose. I originally used this circuit to pulse a scalar coil. I found that the circuit output, while o.k for zapper functionality has a very low power output for use with a coil. To remedy this issue, I have recently redesigned the circuit with a small power amplifier included, which significantly boosts the output from the coil.

Some other things for you to consider when using the zappers are the electrodes themselves. Instead of using two hand held copper electrodes, why not create a true anode and cathode by having a Zinc and a copper electrode? The results are quite interesting.

To view a larger image of the schematic, just click on the image, and it will take you to the full size drawing.

Related Blogs

  • Related Blogs on 15Hz zapper circuit

Radionics Balance Rate

The balance rate is an extremely useful way of balancing the cause of an outcome/condition, be it positive or negative. It can seem a bit daunting at first, especially if you are new to radionics and rates, but hopefully I will help you to understand the process.

To acquire a balance rate, we will first divine the rates for the cause of the outcome. Let’s use a psychic attack as an example, so we would ask “what is the cause for the psychic attack on (name)” and tune the trend dials accordingly.

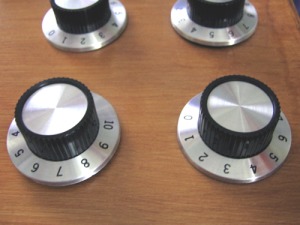
To come to a balance rate let’s assume that these fictional six dial rates were the cause for the psychic attack. [5], [4.4], [7], [9.9], [6],& [3] these rates in the example taken from a machine which has dials calibrated from 0-10.

We would now seek to get the true balance rate for the cause of the psychic attack by taking the original number away from 10, the dial maximum. According to the example the rates would be derived as such:10- 5 = [5], 10- 4.4 = [5.6], 10- 7 = [3] 10- 9.9 = [0.1], 10 – 6 = [4], & 10 – 3 = [7].

This leaves us with the balance rates of [5], [5.6], [3], [0.1], [4], & [7]. The next step is to turn all the dials to zero and realign them to the correct balance rates.

The standard procedure once this is done is to broadcast the balance rates for a small period of time, or to a defined schedule until the effect is noticed. In our example, the psychic attack will subside or stop all together.

As you can see the balance rates can be an effective treatment for all types of negative outcomes and conditions. It is a technique which should be in any psionic warrior and practitioners arsenal.

Related Blogs

Radionics Stick Pad

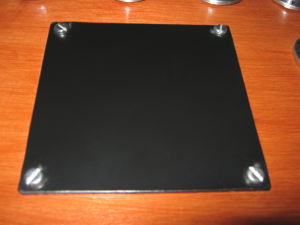
The stick pad is an integral part of any radionics machine, yet many people are confused by this divination method. I have written this short article to give you an insight into the mysteries of the stick pad and how to effectively tune your radionics machines with one, or use one as a simple mean of divination for multiple questions.

A stick pad within a radionics machine is usually a copper plate linked directly to the core of the manifest generator and the rate circuit. On top of this copper plate is usually a thin polymer layer, in some cases glass or even a custom made piece of orgone matrix.

While the stick pad primarily relies on the ideomotor response of the operator I believe there may be a few more subtle energies involved in actually getting the stick. It is my belief through Ministry of defence research that the low frequency natural electric fields, or static as it is commonly known is a manifestation in some degree of the fundamental energy of the universe termed orgone or chi.

When you use a stick pad which has a layer of plastic over the copper plate you are able to create a small amount of static by the rubbing process. It is within some of this static that the orgone energy resides, which can act as a carrier for intention and the radionics signals being output from your machine.

It is a combination of these factors which make the stick pad a formidable dowsing device. It is also the cause of why many people find the stick pad difficult to get used to and opt instead for a standard pendulum. Because the stick pad is producing a combination of energies an experienced pendulum dowser will have trouble overriding their natural ideomotor response to a pendulum. This act is not conscious but resides within the subconscious.

The key to using a stick pad is to let all preconceptions fly out of the window and trust the reactions you are getting form the rubbing plate.

The reaction or “stick” manifests uniquely for each and everyone of us. For some it will appear as if their finger is getting heavier, for others such as myself it will manifest as sticky finger and your finger will be pulled due to friction.

Having just mentioned fingers, it is worth noting that no specific finger or thumb is recommended over the others, just use which ever you feel comfortable with. However, I find being right handed, I prefer to use my left hand to dowse the rates on a stick pad.

It really is worth giving the stick pad a go. If at first you don’t succeed then keep on trying.

Related Blogs

Selecting a Radionics Machine

Choosing a radionics machine

When you first begin to look at radionics you can be overwhelmed with the vast number of machines on offer from various manufacturers. What I aim to do in this article is convey a few ideas and check-list which I use when purchasing a new machine.

Build quality:-

The build quality of the machine can tell you a lot. Take for example, a machine which is selling for a few thousand dollars and made of cheap and nasty mass produced materials, which may even hinder your success with the machine. When I see something along these lines I ask myself a question about the manufacturer, “what’s in it for them?” the answer is usually a ton of money. While there is absolutely nothing wrong with making money, the said manufacturers will be profiting from your failure and the machine which you bought for a lot of money will probably only act as a placebo.

On the other hand, there are some expensive radionics machines on the market which deserve the price tag. I know from personal experience that a high quality radionics machine will take an awful amount of time to construct, not to mention the build cost for the high quality components. What you are paying for is the Mages time and high quality materials/components which go into the machine. This can be crucial to your success with radionics.

A few basic rules:-

As a rule, I will consider a number of factors when purchasing or building a new machine.

Witness & trend:-

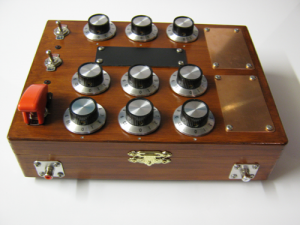
For an advanced and all encompassing machine you should be looking to make sure it has two plates or wells, a witness and a trend. This will allow you to tune into the target and deliver the trend all in one operation, which is far more potent than performing it separately. Of course simple three dial machines work well, but these can and should only be used to broadcast simple trends or outcomes for yourself as the operator.

Dials:-

You should look to ensure that the machine has at least six dials, preferably nine. In the case of the six dial machine there should be three dials for the witness circuit and three dials for the trend circuit. When looking at a nine dial machine, there should be three dials for the witness and six dials for the trend circuit. I find three dials tends to be more than enough for a witness circuit.

Stick pad:-

Although not imperative, every good radionics machine should have one. The stick pad will allow you to form a direct connection with the core of the machine and tune the dials accordingly. You could use a pendulum if the machine lacked a stick pad, but you may have better tuning results by using a machine with a built in rubbing plate.

Quartz:-

It is my opinion that every good machine should have some form of quartz crystal tuning/storage device. The quartz is an ideal vessel for the thought form which is generated naturally by you the operator. It is this thought form which causes the outcome, or trend.

Input & output:-

If you really wanted to explore radionics then you may want to look at getting a machine which has both input and output jacks. These jacks will allow you to hook up a number of peripheral devices, which may enhance your overall operation.

Orgone:-

A radionics machine should contain an orgone accumulator/generator of some description. The orgone matrix should contain 50% metallic and 50% organic whit added quartz to the body. This orgone accumulator will provide chi, which will sustain your thought form inside the machine. It will have the added benefit of allowing the thought form to gain in strength and manifest your trend at a much speedier pace.

Material:-

Last but not least we come to the actual box itself. As a personal preference I build my machines inside wooden boxes, which allows for the free flow of orgone energy and also acts as an extra storage medium for the thought form. In addition it allows me to implement a number of alchemical formulas in a proprietary manner.

You should avoid metallic boxes as these just bounce the energies generated from the radionics circuit all over the place. Plastic boxes are the intermediary between wood/organic and metallic. The plastic can work just fine but this is usually dependent on the actual polymer used.

So there you have it, a few simple rules I follow, which allows me have remarkable results with all of my radionics machines. In the end, you should follow your intuition when searching for a machine, if you feel a calling then it may be worth investigating further. If it has some of the above features then all the better.